Introducing Basic
This is a post on a relatively old project, started November 2015.
I am designing another new 3D printer. Please send help. I can't stop. pic.twitter.com/iVjnEU2oMr
— Brandon Pomeroy (@AchillePomeroy) November 13, 2015
After spending so many hours working on my BIG METAL PRINTER, I felt the need to step back and atone for all the mistakes I had made on the journey. This printer is the result of many late nights modeling. Unlike my last printer, this will be the entire ride in a single post. Get ready for a long one!
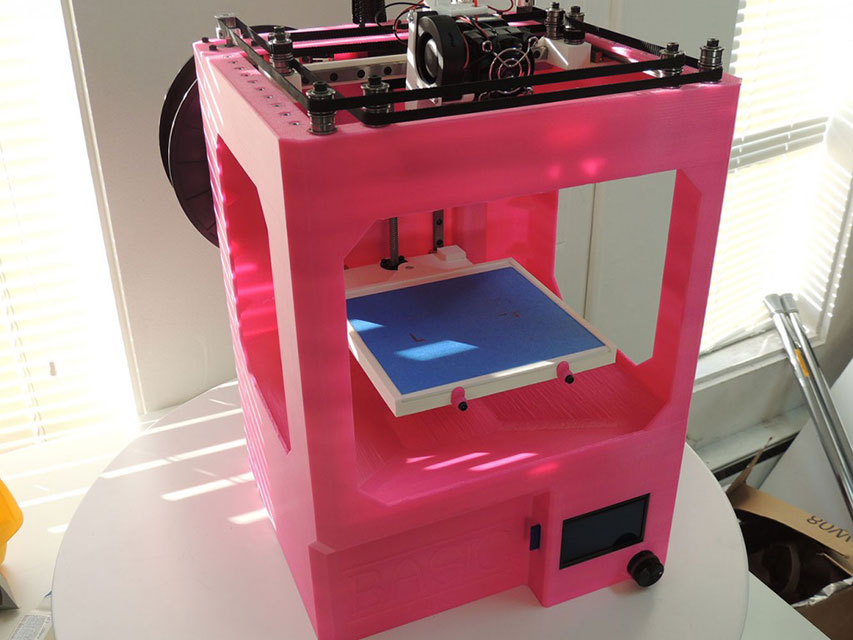
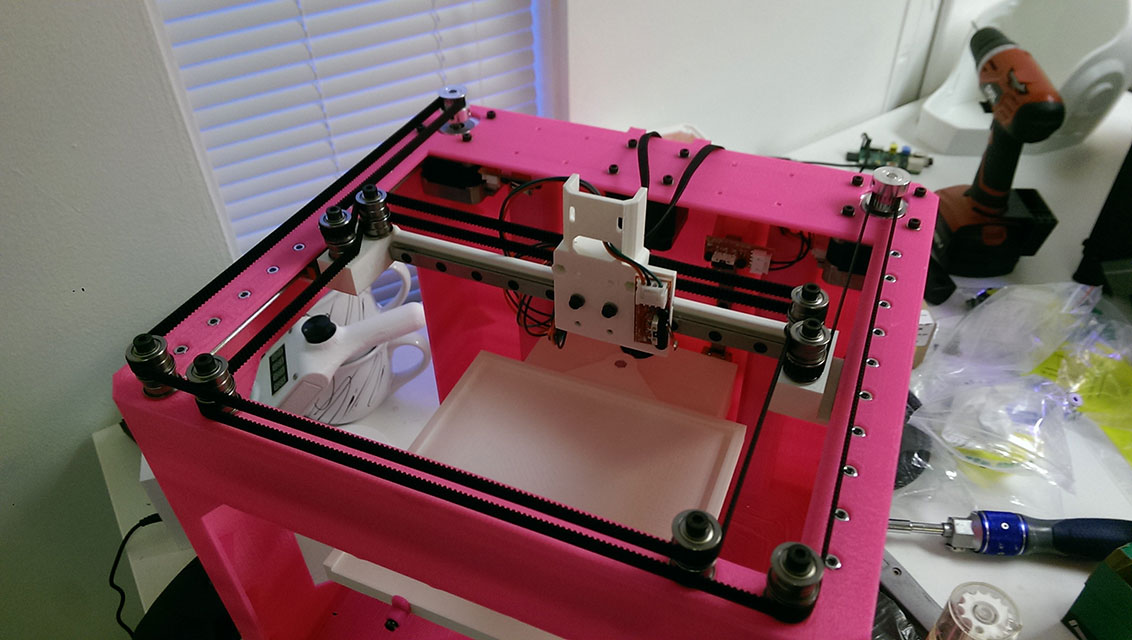
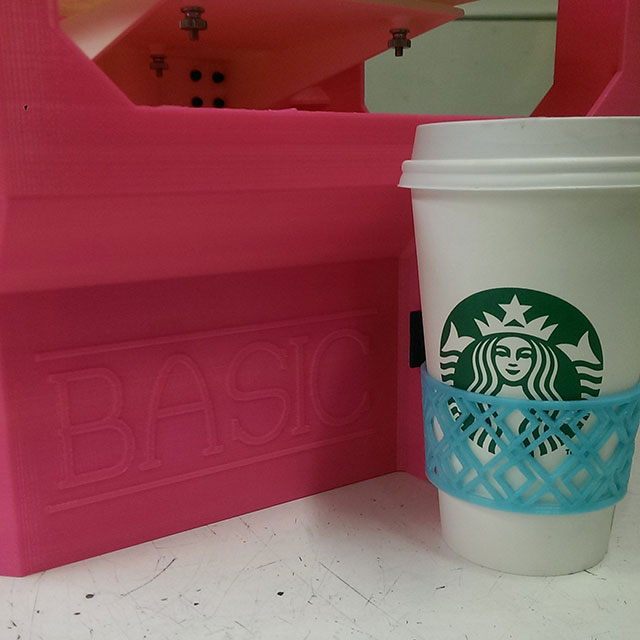
To start off, lets see a photo of the finished product:
The Regrets of the Past
One of my biggest regrets of ConfinedXY was rushing the modeling of it. We were so eager to begin building that we basically stopped digital work once the skeleton was finished. We rationalized it by saying “Oh, it will be easy to just figure out what we need once we have the frame”. In reality, the opposite happened. Putting together the frame made us complacent, and we never did get around to actually adding a nice skin. It also skewed the BOM and price – adding a proper skin to ConfinedXY would probably be an additional $1000 or more (Remember that we were building these quantity of 2).
A secondary issue arose when we went to do wire routing. We didn’t really plan out where the wires would go, and our resulting bots look very messy. I am a huge advocate of proper wire routing, and realizing that we were going to have to do so much work just to make the wiring acceptable was very disheartening.
Neither of these problems exist with Basic, and I attribute that to much more strict and proper planning. It was a lot more work upfront, but was absolutely worth it.
The Basic Frame
I have been involved in the RepRap scene for quite a while. I built my first printer in Fall of 2012. It was a Clonedel, a Prusa Mendel fork made by Mark Ganter and the UW Solheim Lab. 3D printers printing themselves has always been the catchphrase of the RepRap movement, but I’ve always been a bit disappointed by the application. Sure, the custom brackets can be printed and can save an enormous amount of time, but the user still has to assemble the printer. Printers like the Prusa Mendel/Clonedel, the PrintrBot, and the early MakerBot machines require a tremendous amount of vitamins (Non printed parts) to be assembled. Basic doesn’t get away from that completely, but does so more than most.
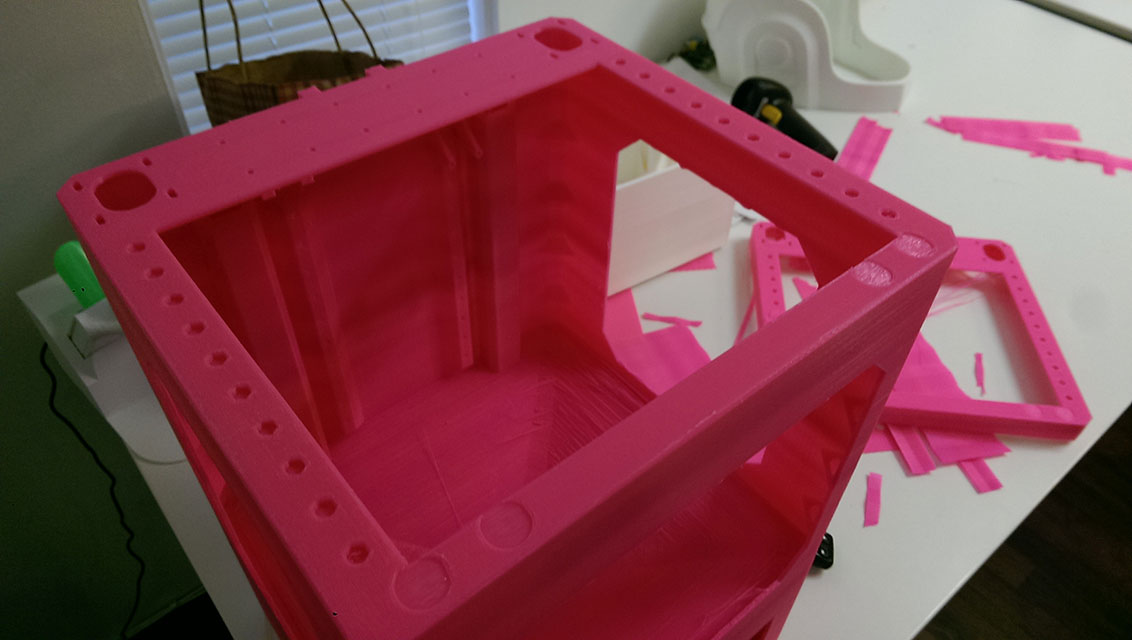
In most printers, any printed parts are usually limited to brackets that hold the rods or lasercut panels that form the printer frame. Basic’s frame, by contrast, is printed all in one piece, and pops off the machine nearly ready to go (Some built in support material is removed). This made things like wire routing and overall industrial design SUPER EASY in comparison. If I needed a mounting point for cables, I just added one in digitally. If I wanted to chamfer the edge of the printer or emboss some text, it was just a few more features on the model’s tree.
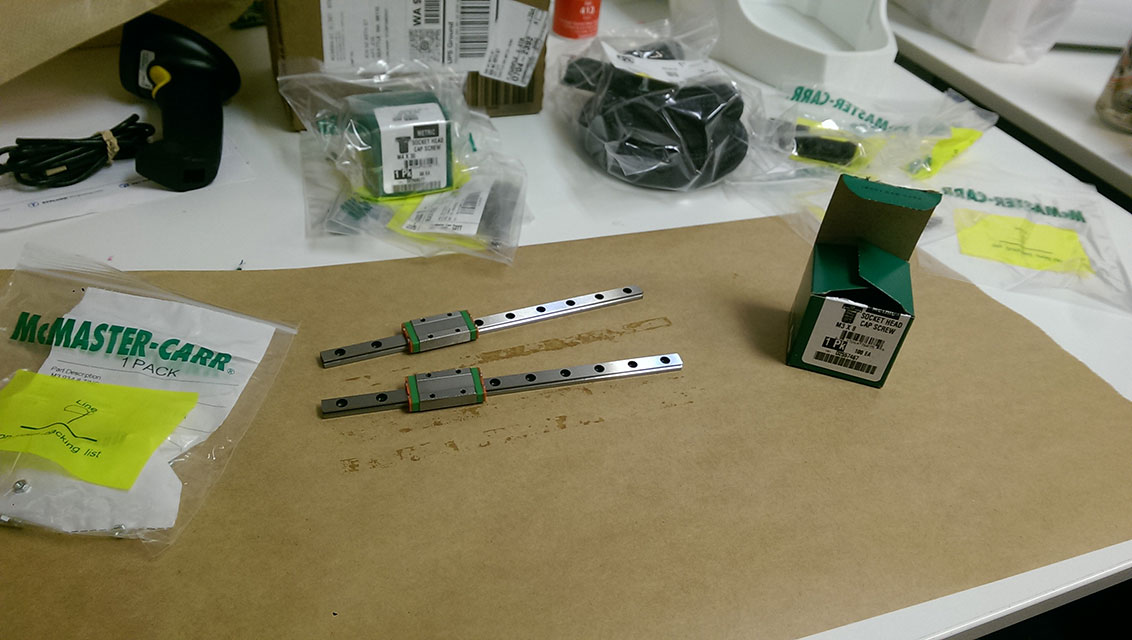
Another great advantage of having a robot fabricate your entire frame is precision. Basic’s linear system is a set of MGN9H rails bolted to the frame. Normally when building a printer, you have to carefully align the linear components to avoid binding. With Basic, I know that the rails are parallel. It makes assembly much faster and less error-prone.
The Journey
Alright, enough about why I made Basic the way it is, let’s get to how. Less words, more photos!
The real magic of Basic (Other than its printed frame) is the CoreXY gantry and belt configuration that I designed for it. I have not seen this particular belt configuration anywhere else, but it solves a lot of problems that I’ve experienced with the CoreXY system. It hides the belt crossover to the casual observer (Which just makes the printer look a bit cleaner), and it makes it dead simple to clamp the belts to a carriage. Please note that the above image is an early iteration, and the kinematics are not exactly correct. This was corrected in a later revision.
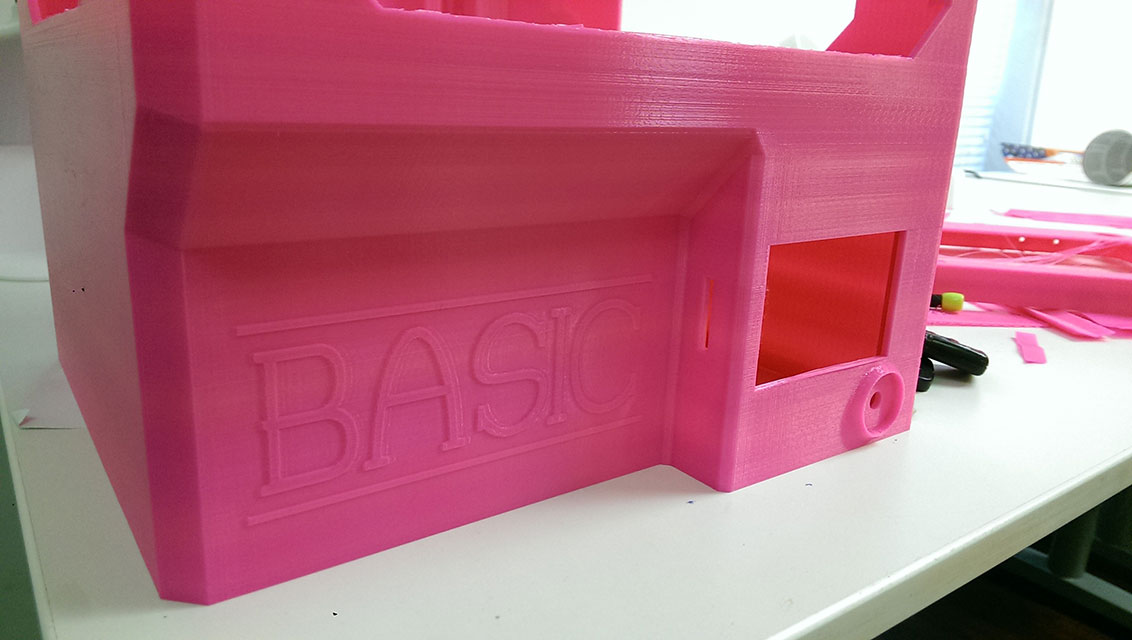
Here’s a great example of being able to keep both function and form while designing Basic. The SmartRap Full Graphics controller has its SD card slot on the left hand side of the screen, but I wanted the display to be on the right side of the machine (Since I am right handed). I was able to cut a small pocket into the frame, and get the best of both worlds.
As an added bonus, that area is perfect for some branding! I embossed the printer’s name onto the machine.
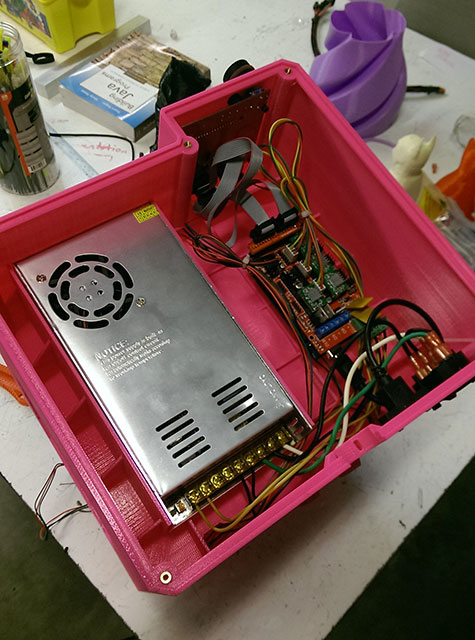
I don’t have any images here, but I also built in cable management. I wanted to see no more than 2 inches of wire at any time. I integrated printed channels into the back of the machine that hid the wires from view, which worked out beautifully!
The Printing
Just over a month after my first tweet about Basic, the printing had begun. The first step was to print just the base, to make sure that the electronics fit correctly. MakerBot Desktop told me that the print time would be only 10 hours…
Alright, so that was slightly off. But the print finished, and things mostly fit:
Time for the real thing. After a few false starts, we were cruising!
Here’s a quick timelapse that I recorded and put on the intentional3D YouTube Channel. You can find our “official” blog post about Basic here… this post is just my personal ramblings!
So after a total of 149 hours, 35 minutes, and 33 seconds, the Basic frame was completely done!That’s just over 6 days of straight printing! This was definitely my longest and most stressful print I have ever done.
Assembly
Once the printing was finished and my belts and pulleys showed up, it was time to put it all together. Thanks again to modeling everything, down to the nuts and bolts, I knew exactly what I would need.
First remove the part from the printer and remove any support material
Appreciate the branding
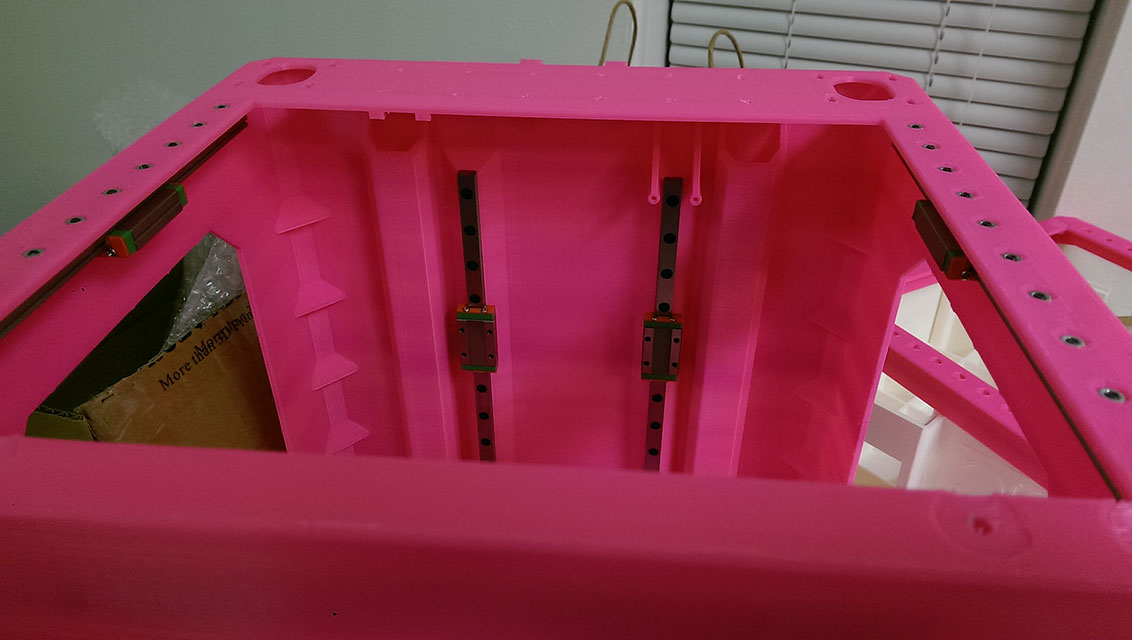
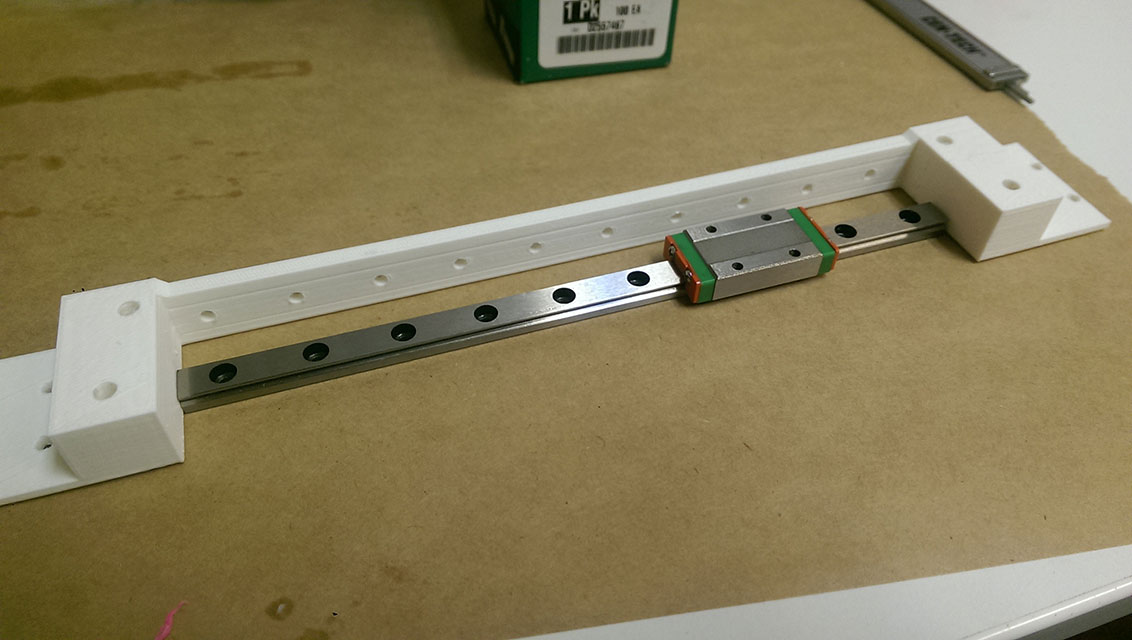
Linear motion was achieved with MGN9H rails
Captive nuts hold the rails in place
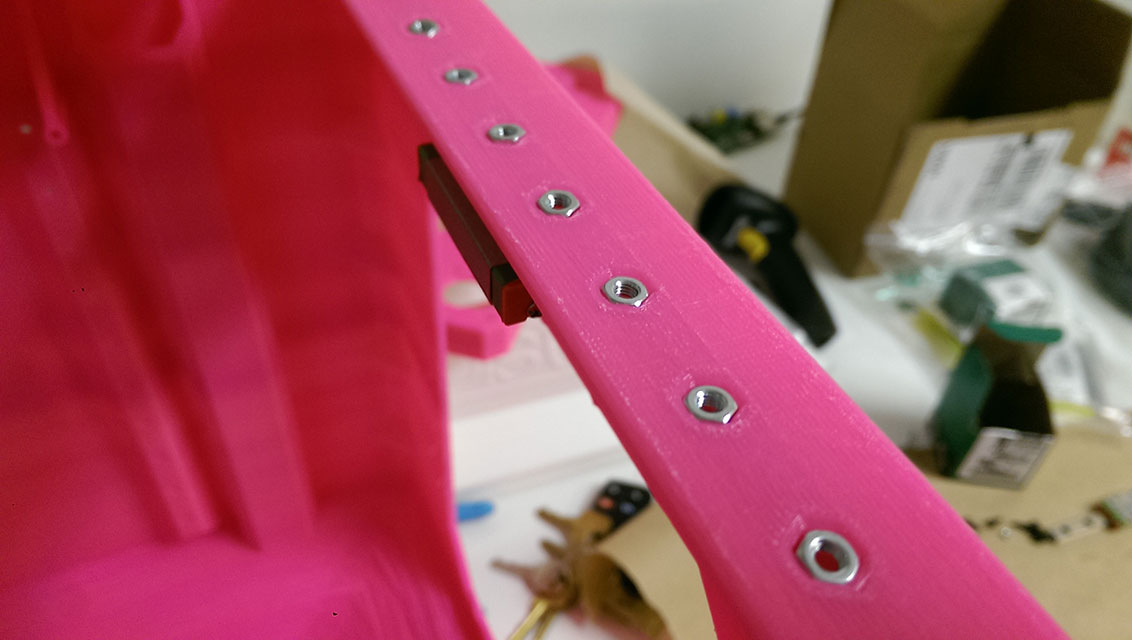
The rails were very easily installed
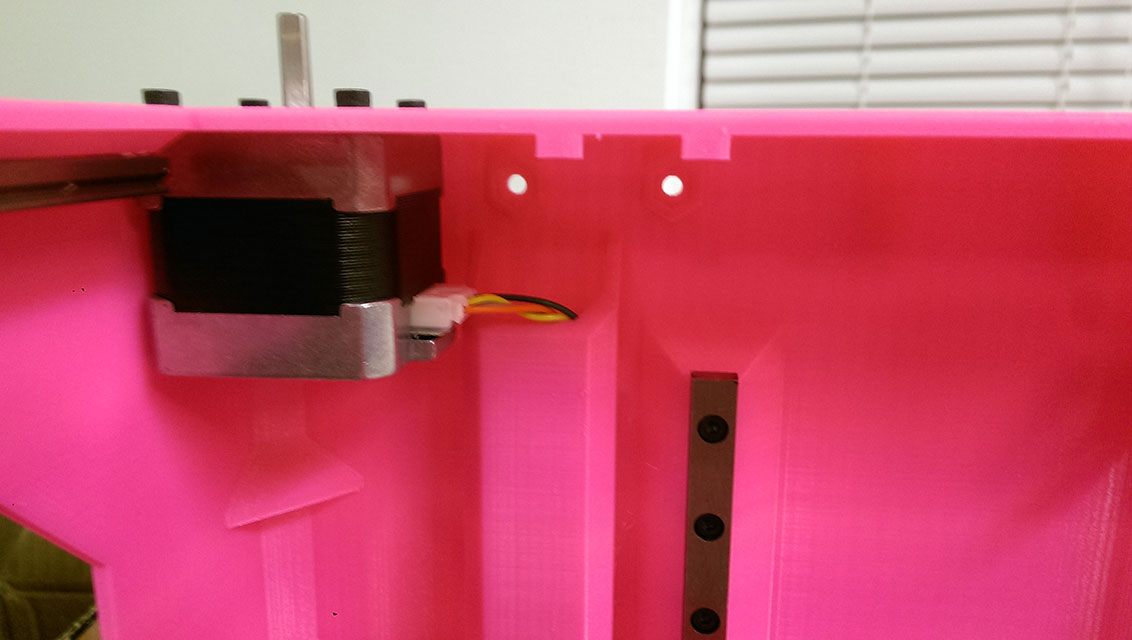
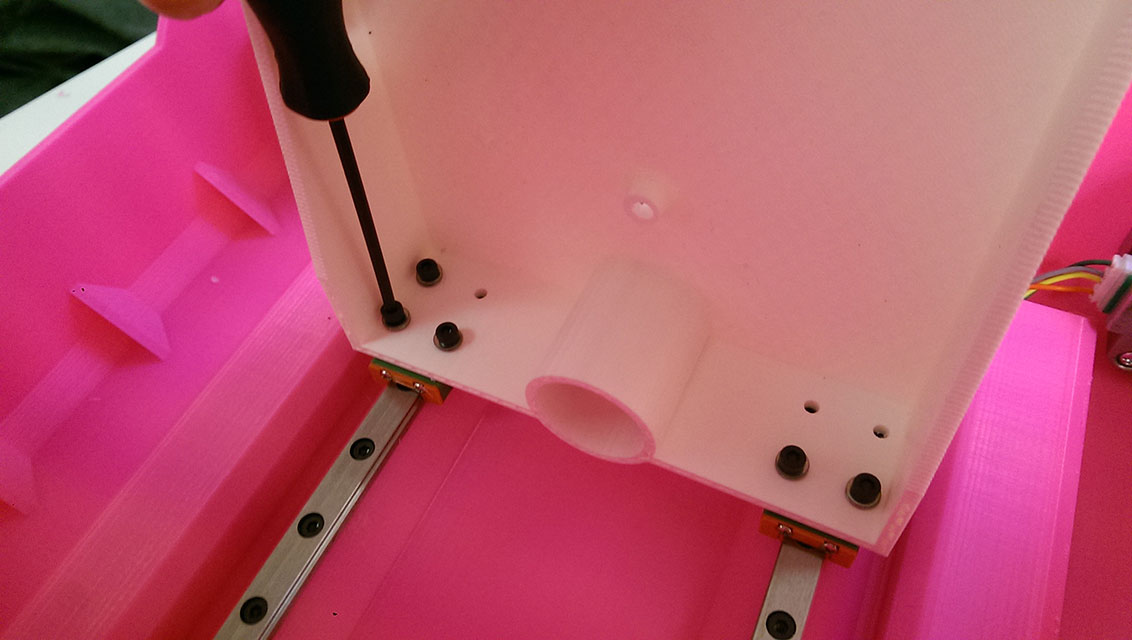
Next came the motors, and the cables were threaded through the buit in wire management
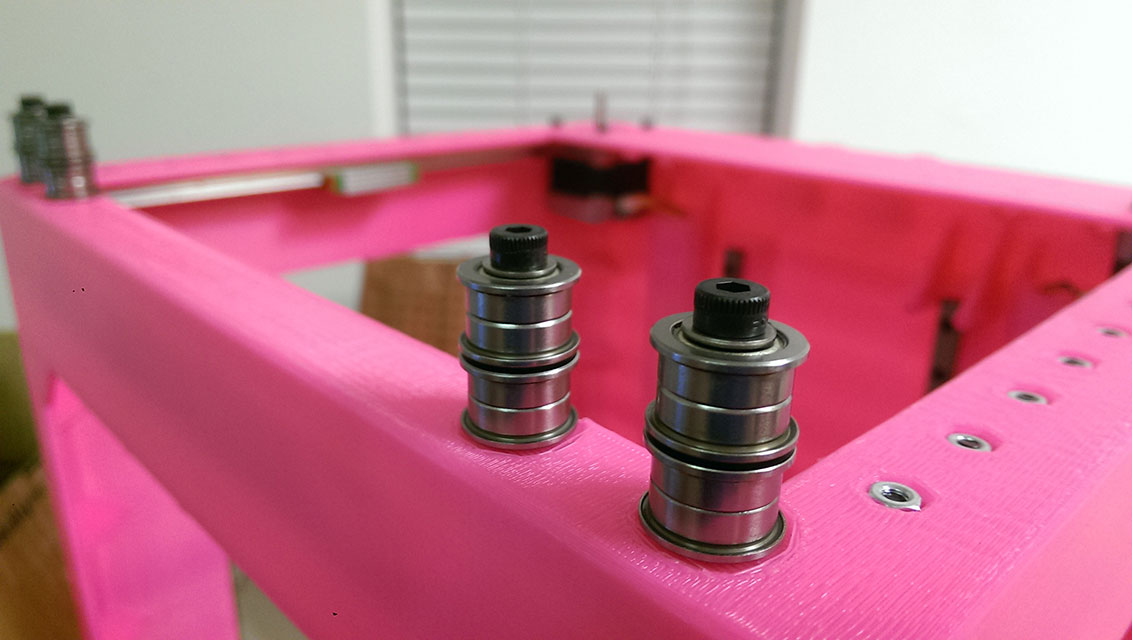
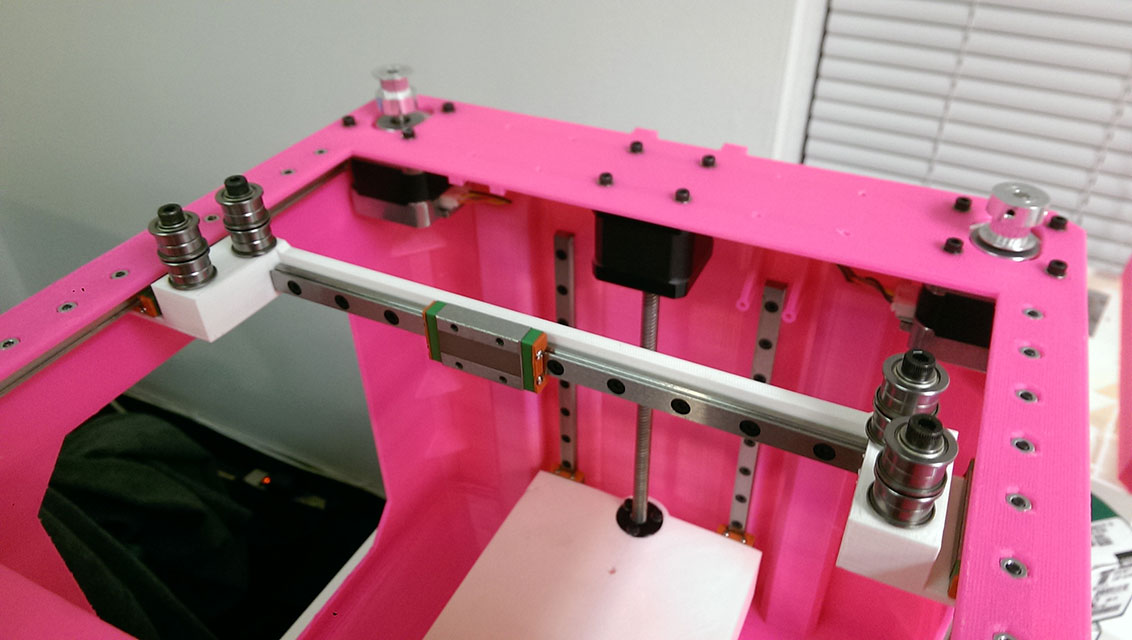
Bearing idlers were assembled and installed
The X-Axis crossbeam was assembled
The Z-Axis mount was assembled and installed
The Z-Axis motor with integrated leadscrew and crossbeam were installed
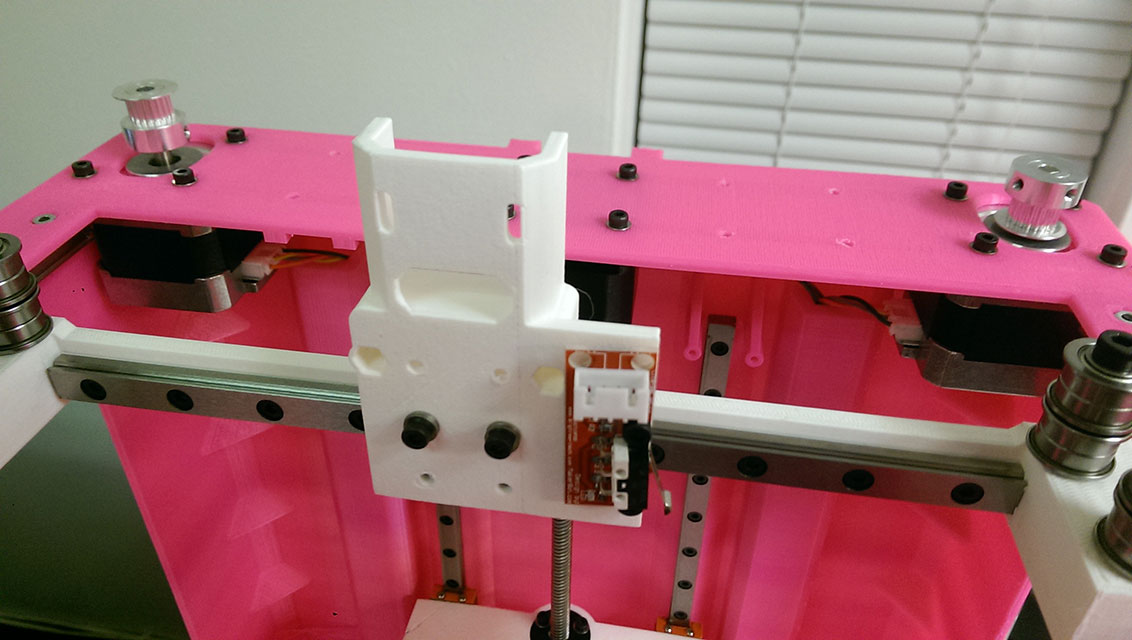
The extruder carriage was installed. It includes the X-Axis endstop as well as strain relief for the extruder and hotend cables
Belts were then wrapped and the CoreXY gantry was completed
I added a spare MakerBot Extruder

And lastly threw in some electronics
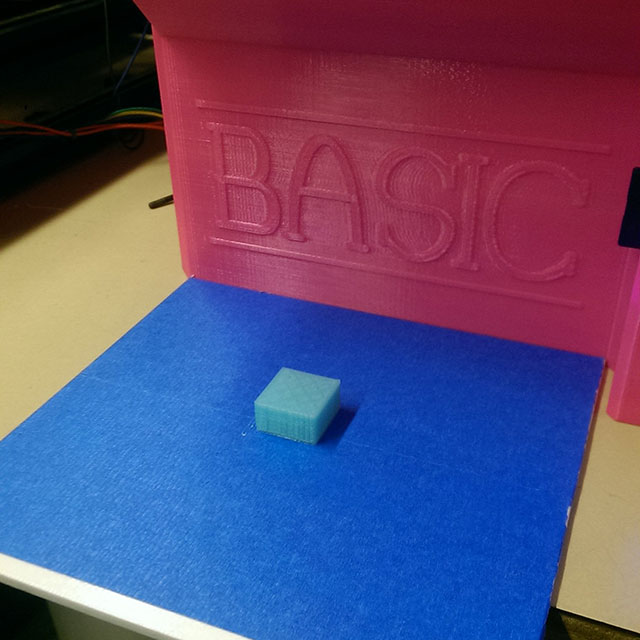
I quickly calibrated Basic (Which was fairly easy, given that I used 20 tooth pulleys for X and Y, a sane leadscrew for Z, and a known extruder) and printed my first part: A small box
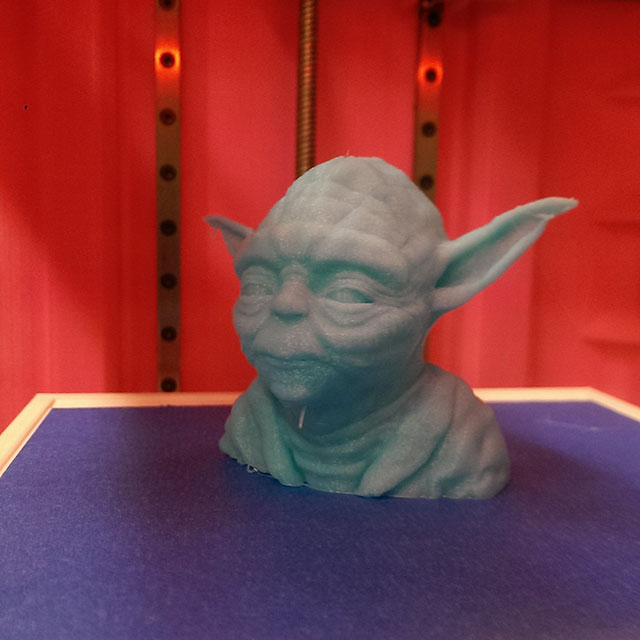
I printed another test, Yoda-lite
And lastly a photoshoot with a delicious PSL
##The Regrets of the Future Overall I am very, very pleased with how this project came out. It’s incredibly satisfying to take a project from nothing to completion over the course of a few months, and I think my meticulous planning while working in CAD helped this. There were definitely hiccups along the way, however. 3D printing every part of this printer (Including the print bed itself!) proved to be a detriment to actually printing parts on the machine. The X crossbeam is a little wobbly due to the natural flex of the plastic. I had to slow my printing speed and acceleration way down to deal with this.
I also wish I had added even more wire management than I did – I modelled the placement of the various components like the PSU and RAMPs board, but neglected to model the wires themselves. It ended up working out, but was a bit of a mess.
Moving Forward
This particular model is the Basic #PSL. In a project for work I built out a Basic #NoFilter, which moved from a printed frame to a folded sheet metal one. That particular model unfortunately stalled out, and the current model I am tinkering with is Basic #TBT, which will have some neat features like dissolvable support material and a really beautiful interface. Hopefully I’ll be writing a blog post about that one day!
Let me know what you think of this article on twitter @AchillePomeroy or leave a comment below!